Step 1: Navigate to the Email Settings
To navigate to email settings:1
Go to Settings
Click the Settings button at the bottom of your sidebar.
2
Go to Organization Settings
Click the Organization button on the settings sidebar.
3
Go to Organization Email Settings
Click Email in the navigation bar near the top of the page.
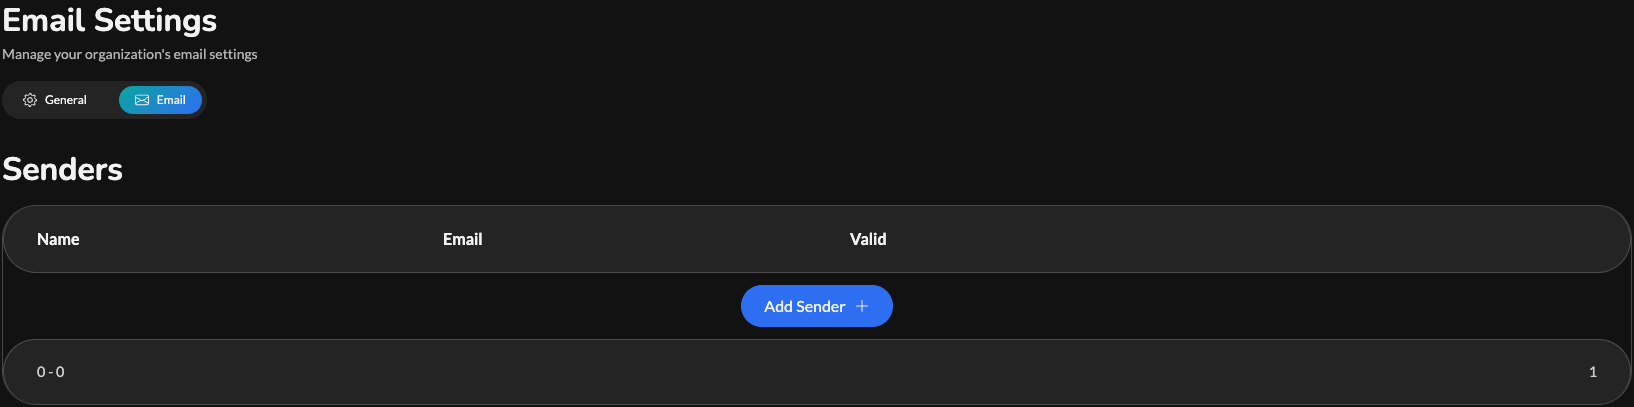
Step 2: Create Sender
To create the sender, first open the Add Sender modal by clicking the Add Sender button. You should now be on a screen like this: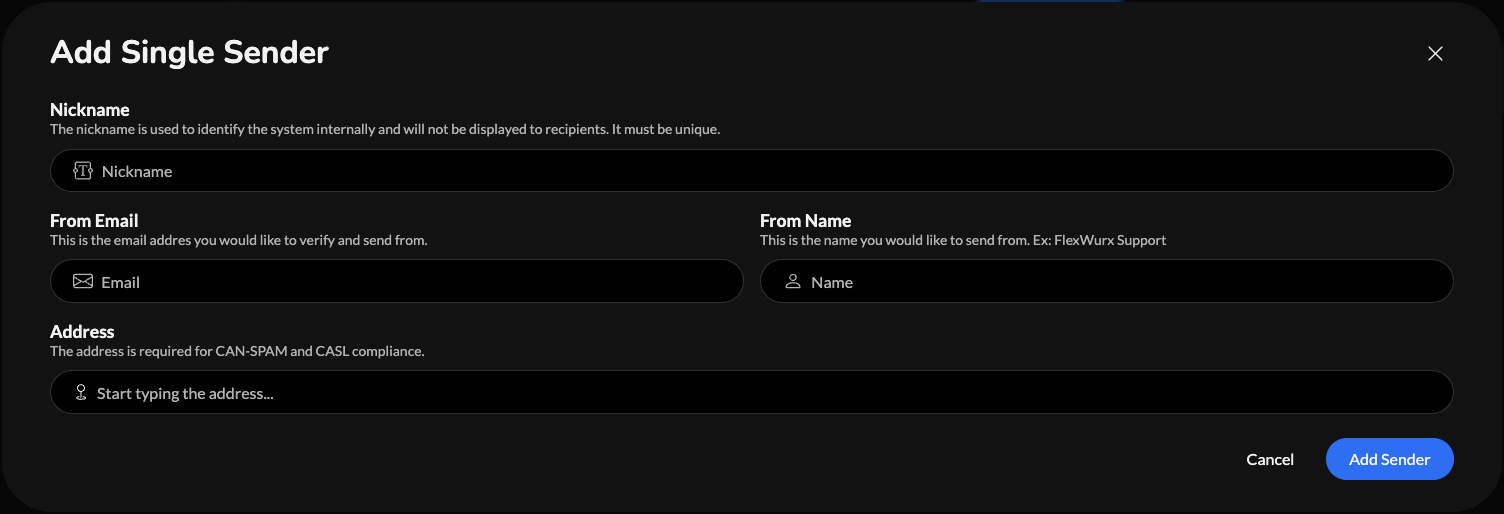 Now, fill out the form. Here is an explanation of each item you need to fill out:
- Nickname: This is used to identify the sender in the FlexWurx Dashboard. It will never be displayed to recipients. It must be unique.
- From Email: This is the email address you would like to verify as a sender and send emails from.
- From Name: This is the name associated with the email you are verifying.
- Address: This is your current business address. This is needed to comply with CAN-SPAM and CASL.
Step 3: Verify Sender
The final step you need to do is verify your sender. To start this process, you should have recieved an email from [email protected]. That email should look like this: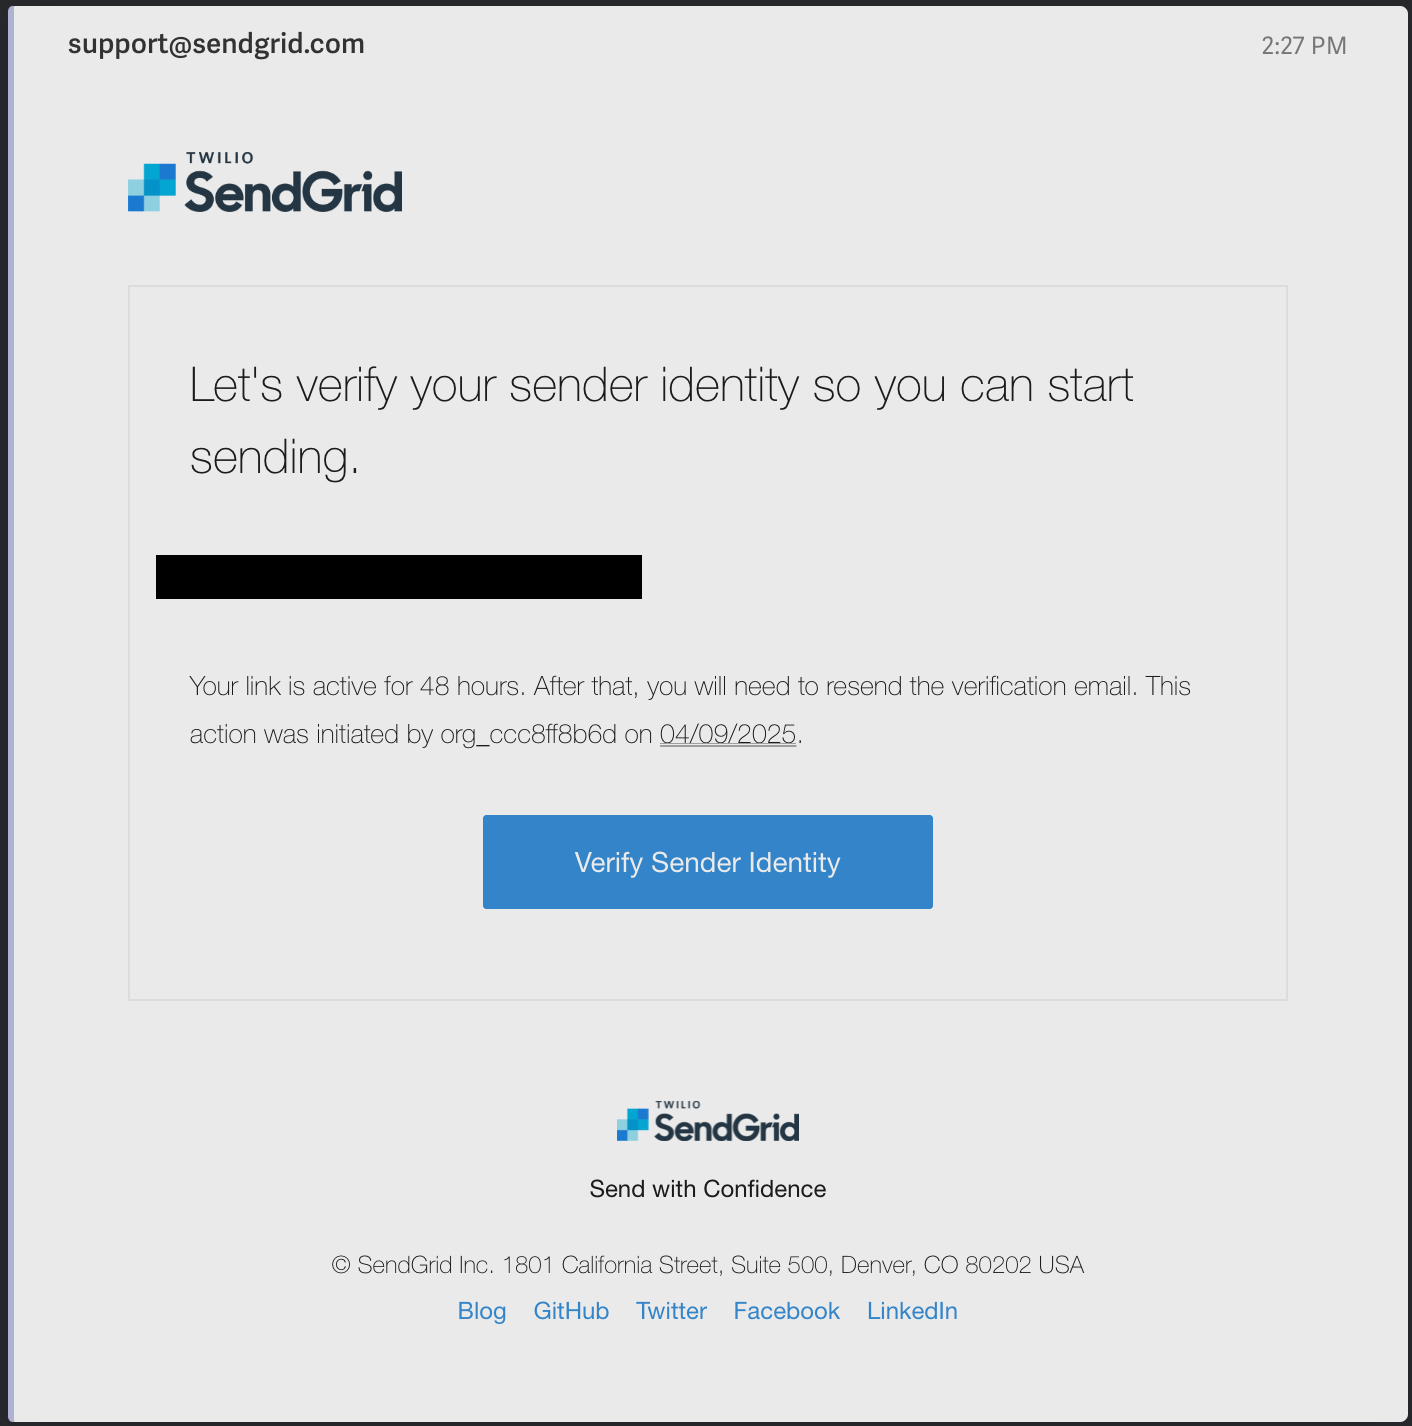 Where the blackbox is in this image, there should be the email you are attempting to verify.
Go ahead and click the Verify Sender Identify button. That should direct you to this page:
Where the blackbox is in this image, there should be the email you are attempting to verify.
Go ahead and click the Verify Sender Identify button. That should direct you to this page:
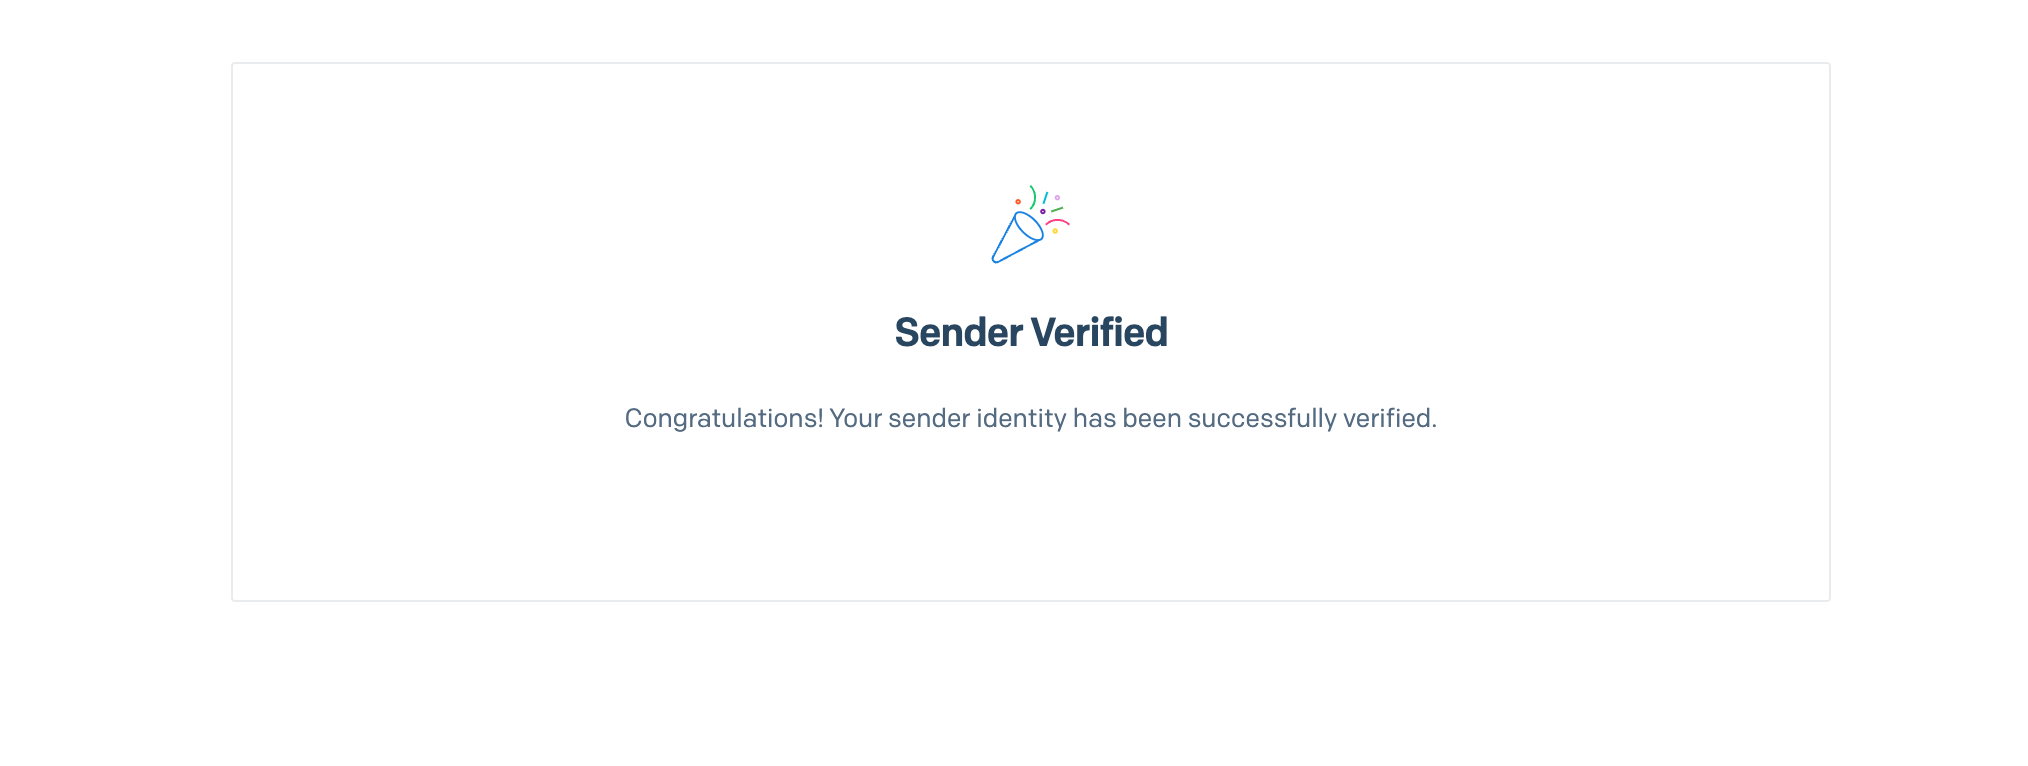 Now, you can go back to the Organization Email Settings page in FlexWurx and reload the page. Once you do, you should see that your sender is verified, as seen below.

If you have any issues or need support, feel free to reach out to [email protected].